The Exhibit Record
Once the new exhibit is created, the remaining parts can be set up, including the floor plan, booths, and booth permissions. To set up the exhibit, open the Exhibit Record and set up and manage remaining event details under the following tabs:
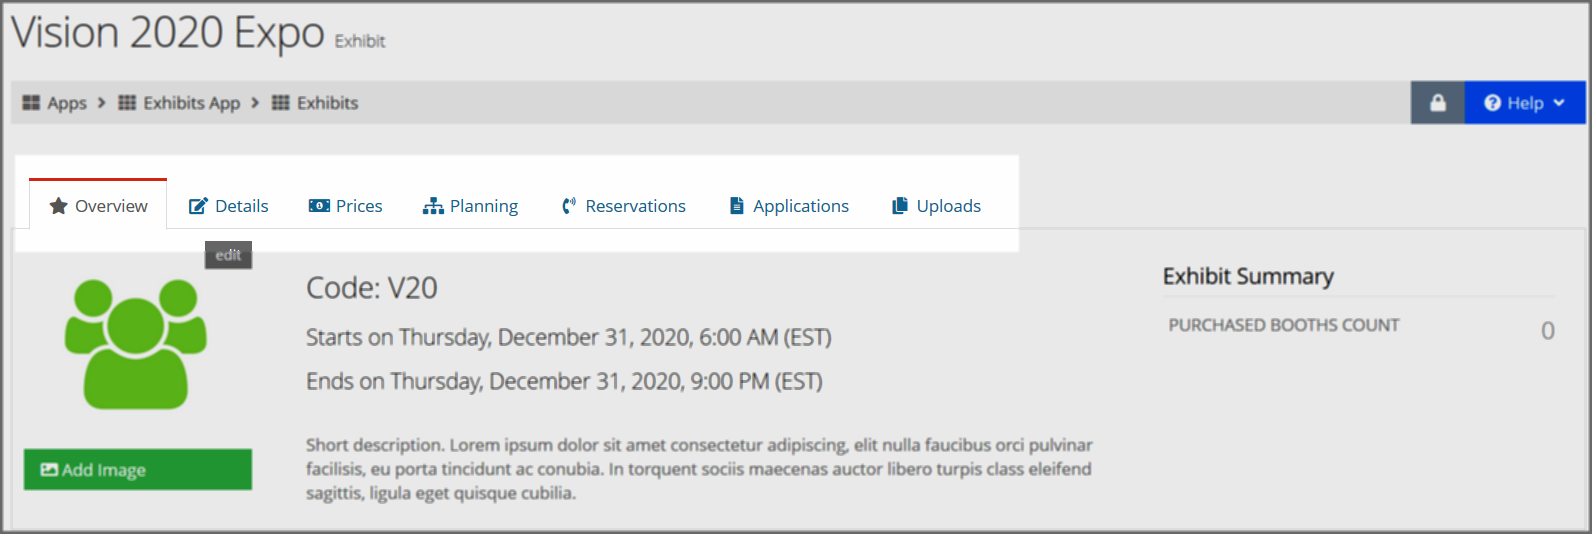
Overview Tab
An overview of the exhibit, including any image, short description, start and end dates, as well as the number of purchased booths.
Details Tab
In the Details tab, manage the information created when the exhibition record was originally saved, and set up additional options.
The Details tab holds the following menu options:
- General Info: Manage the exhibit code and name, availability dates, tags, and more.
- Feature Listing: Setting a featured start and end date for an exhibition causes that exhibition to appear as “featured” on the Upcoming Exhibits page. Featured products appear at the top of the online store list with a “featured” banner.
- Public Descriptions: The short and long descriptions allow staff to set up detailed descriptions for the exhibition that will appear for customers. Enabling the required signature setting, requires exhibition attendees to agree to the Signature HTML as well as sign and/or initial their agreement.
- Additional Info: Staff can create an error message that will appear when a customer is unable to register for a booth. The Exhibitor Coordinator set here will receive a notification whenever a booth is purchased.
- Categories: A category is essentially a label that can be applied to a record in the system, and can be useful in differentiating records of the same type. Assign categories to the exhibit as necessary. These categories are created under the Products App > Setup.
- Exhibit Dates: Manage the start and end date and time for the exhibition, as well as the time zone. If you plan to have early, regular, and/or late registration prices for exhibition attendees, set those dates here to allow more streamlined price creation in the Prices tab.
- Confirmation Email: In the Confirmation Email menu option, staff have the option to turn on the secondary confirmation email for the exhibition. This confirmation email goes out in addition to the baseline confirmation email, but with the top and bottom HTML created in this menu option. Staff can also enter a BCC Confirmation Email—whenever the confirmation email goes out to a customer, a BCC will also go out to the email address entered here.
- Change Logs: View the change history for the exhibition.
Prices Tab
Prices created under the Exhibit Record > Prices tab are for exhibition attendees only, and do not apply to exhibit booths.
Note: What is an exhibit attendee? Attendees are not booth purchasers, but people who are simply attending to enjoy the amenities of the exhibition. For associations simply wishing to sell and manage booths, enabling attendee registration is not required.
Because booth prices are set up separately—under the Exhibition Record > Planning tab—it is possible to leave the Exhibition Record > Prices tab empty and still use the Exhibit Record’s floorplan functionality to sell booths.
Tip: For clients wishing to register exhibit attendees and sell booths, it's recommended that staff sell attendee registrations via an Event Record (created separately under the Events App), and utilize the Exhibit Record exclusively to sell booths to exhibitors.
If attendee registration is allowed, the option to register to attend will appear under Upcoming Exhibits > More Details for non-staff users.
Tip: For more on attendees, see: Allowing Exhibit Attendees.
Planning the Exhibit
The exhibit floor plan and booths—including creating a hall, uploading a .dwg floor plan, setting booth permissions, and creating booth prices—are set up under the Exhibit Record > Planning tab.
For assistance in creating an exhibit hall and floor plan, see the help topic Adding an Exhibit Hall.
Managing Reservations
Any reserved booths are listed under the Exhibit Record > Reservations tab.

Managing Booth Applications
If applications for booths have been received, staff can assign and vacate booths from the Applications tab.
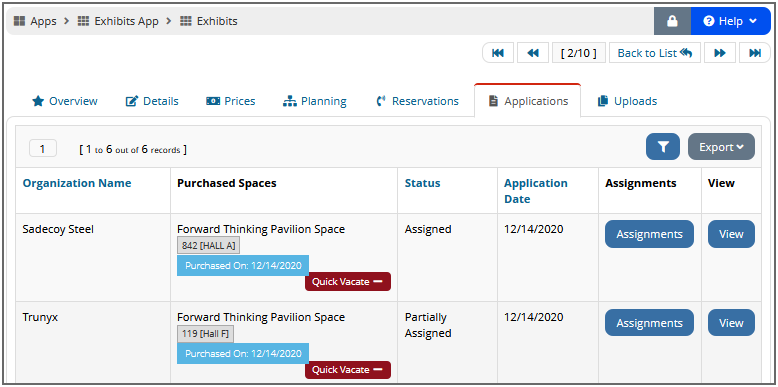
Exhibit Uploads
If any documents should be associated with the exhibit, upload these under the Uploads tab. Documents under this tab become available to exhibit attendees and booth holders.